Content
- About the Monero GUI Wallet
- Wallet installation
- Creating a new wallet
- How to use the Monero Gui wallet
- Sending XMR
- Receiving XMR
- Advanced Wallet Features
- Wallet settings
This review will introduce a thick wallet for storing Monero (XMR).
Monero (XMR) has long been one of the most popular coins in the crypto world and has justifiably taken its position in this market. This is truly one of the best privacy-focused coins. Despite its long existence, for a long time the coin had only a console version of the wallet, and only last year a user version appeared - Monero GUI. Wallet options for storing Monero:
- Desktop versions:
Windows, Mac OS, Linux, you can download on the official page https://getmonero.org/downloads/ - Mobile version:
released recently and, according to reviews, somewhat damp. Currently available only for Android: https://monerujo.io/ - Online version of the wallet:
yes, you can register at https://mymonero.com/ - Paper Wallet:
To create a paper wallet, go to https://moneroaddress.org/
Attention!
Choose one version that suits you and use it. The most reliable option is the desktop version, which we will discuss in detail below.
Standard Monero GUI
While it may not seem like the most attractive thing to use, the regular Monero GUI wallet was created specifically to keep users safe at all times. New update files like Helium Hydra, which were released not so long ago, regularly appear there. This wallet can be installed on any operating system, including Windows, Linux and Macintosh. This is a pretty decent wallet that is not difficult to learn and does the job well.
As with any desktop cryptocurrency wallet, users should take some precautions to properly protect Monero assets. Setting up a password-protected wallet is of utmost importance. Also, always make sure you back up your wallet.keys file correctly in multiple ways to avoid losing funds if your computer is suddenly attacked or crashes.
In Beta 2.0, the developers have not yet finished supporting 32-bit Windows, FreeBSD, DragonflyBSD, ARMv7 Linux and ARMv8 Linux devices.
If the GUI does not start on Windows or starts with a blank screen, try starting it using the start-low-graphics-mode.bat batch file. The unsigned transaction format used by cold wallets can cause problems when moving between platforms (e.g. Linux to Windows) for signing. Cold transaction signing does not work with split transactions (sends split into multiple transactions).
After downloading the source, always check the hash amounts to make sure you downloaded exactly what you wanted.
A list of hashes signed by GPG can be found at https://getmonero.org/downloads/hashes.txt.
About the Monero GUI Wallet
Monero GUI - official wallet (desktop version) for storing Monero (XMR). It is a full node wallet or a “thick” wallet, which means downloading the entire blockchain and uploading it to your computer.
Pros of the wallet:
- Hierarchically deterministic wallet. Wallet recovery is possible using the Seed key, in Monero Gui this is a phrase of 25 words.
- These are the type of thick wallets that are the safest for storage.
- The ability to create “cold” storage of funds in the advanced wallet functions.
- Possibility of mining directly from the wallet. We are talking about solo mining, which in current realities is not very effective. But the opportunity itself is unique; such an implementation is difficult to find in other wallets.
Disadvantages of the wallet:
- Long-term blockchain synchronization. If the Internet speed is low, synchronization may take several days.
Objectively, we couldn’t find any more serious disadvantages.
Desktop client
You can find the program on the official cryptocurrency website GetMonero.org. Go to the "Downloads" section and select the files for your operating system.
The program runs under Windows(32.64-bit)/Linux(32.64-bit)/Mac(64-bit). Wallet for xmr is a heavy client.
To fully work with it, you will have to wait until the blockchain is fully downloaded to your computer. When using such software, you should remember to make regular backups. If your computer or operating system crashes, you may lose all your coins. They can be restored from a backup copy.
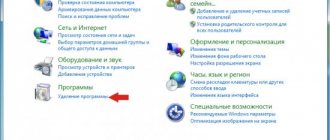
Wallet installation
To install the wallet, you need to go to the official Monero website and click “Downloads” at the top of the page.
In the next window you need to select the OS to install the wallet. Monero GUI is only available for 64-bit Windows systems (only the console version is available for 32-bit ones). Select Windows, 64-bit.
The download of the zip archive, weighing 146 MB, will begin.
After downloading, you need to unzip it and run the file “monero-wallet-gui.exe”
Official local Monero Wallet
To download the official Monero Wallet, go to getmonero.org and select the program for your operating system (Windows, Mac, Lunex). Installation is also available on mobile devices.
Instructions on how to install the Monero Wallet on your computer:
- After downloading, unzip the folder and start the installation by clicking on the monero-wallet-gui.exe file.
- Allow the program access to networks for further work:
- Select the interface language from those offered. Russian language available:
- Select installation or recovery type. In our case, click “Create a new wallet”:
- Give the wallet a name and write down the seed in a safe place. Specify the location where to install the program:
- At the last stage, create a strong password and repeat it.
- A window will appear with the main parameters of the program:
- To work, you will need to synchronize your Monero wallet with the network. Progress can be seen at the bottom of the program; the number shows how many blocks are left to download. The process will take a long time (several hours). You can receive cryptocurrency even before the blockchain is downloaded.
Article: “Ripple Wallet (Ripple)”
- To find out the Monero address, you need to click “Get”. In this case, you can use the ID or do without it. To transfer cryptocurrency to another wallet, you must click “Send”, specify the recipient’s address and ID, if required.
Is the program simple? it's easy to figure out. In the settings, you can agree to mining and thereby earn money by providing the power of your computer.
The client is supported by official developers, which means it is the most reliable for storing the Monero cryptocurrency.
Continued: “Ethereum Wallet.”
Creating a new wallet
Let's create a new wallet.
In the first window you need to select a language. Here you can play it safe against possible problems and choose English (Russian is also available). But if you are not at all comfortable with the English language, you can choose Russian.
In the next window, select “Create a new wallet”. Make sure the checkbox is NOT next to the "Testnet" option.
In the newly opened window, in the top line, you need to come up with a name for your wallet.
Below will be your Seed key, which needs to be copied onto paper. You can also copy it to the clipboard using the icon in the lower right corner. This is the most important key to your wallet, do not show it to anyone or enter it anywhere. It is noteworthy that when you select the Russian language, your words from the phrase will also be in Russian.
Of course, this wallet that I create for this review will be deleted in the end, since the Seed key has already been compromised.
At the very bottom the path to the location of your wallet in the Windows system will be indicated.
Attention!
Carefully check that the path is written only in Latin. Otherwise, failures may occur.
Click the right arrow.
At this stage, you need to come up with a complex password that you will use to log into your wallet. Below, the wallet will tell you how secure the password is. And click on the right arrow.
Finally, you will see a page with general information about your newly created Monero GUI wallet. Then click “Use Monero”.
You have created your wallet for Monero, now let's look at the internal functionality.
Buying Monero: Creating a Monero Wallet on MyMonero.com
Creating a wallet on MyMonero.com
First, you will need to get a Monero wallet so that you can store your cryptocurrency there. Creating a Monero wallet is especially easy at MyMonero.com.
- Open the MyMonero.com website in your browser.
- Right in the middle of the page you will find a “Create A New Account” button. As soon as you click on it, your private wallet will be created immediately.
- Now scroll far down the page to the “Your Private Login Key” item. There you will find a randomly generated set of words.
- You should definitely copy/write this set of words somewhere and save it. If this data is lost, you will not be able to regain access to your Monero wallet.
- After you “confirm” your understanding of the importance of the information received and copy the code set of words into the “Confirm your Private Login Key” field, your Monero address will appear on the screen, with which you can receive Monero. In this case, no one will be able to draw any conclusions about who is the owner of this Monero address.
How to use the Monero Gui wallet
At startup, the so-called Monero “Demon” will launch - a program that downloads and synchronizes the blockchain with your computer. This process is not quick and will require some time and patience.
In the lower left corner you can see what stage the blockchain is in synchronization. The inscription “Waiting on daemon synchronization to finish” warns you that you need to wait for the synchronization to finish.
Attention! You cannot receive or send coins until full synchronization is completed.
Advice:
to speed up the synchronization process, you can connect to a remote node. In this case, the blockchain is not downloaded, the connection will be much faster.
To connect to a remote node, you need to go to the “Settings” section in the control panel on the left. In the “Manage daemon” section, stop the Demon, click the “Stop daemon” button. Then in the “Daemon address” section, in the left line, indicate node.xmr.ru, and in the right line - 13666 and click “Connect”. Things will go much faster, and soon you will be able to make various transfers.
As a result, you should see “Connected” in the lower left corner
This will mean that you are connected to the network and can perform any operations.
Instructions for installing and configuring the wallet
Monero gui wallet does not require installation. Download and unpack the zip archive, run the monero-wallet-gui file and start setting up the client.
If you have Windows, then make sure that anti-virus protection does not block the program. You can use the appropriate key combinations to make working with your wallet easier.
- Ctrl + Tab - go to the next settings page;
- Ctrl + Shift + Tab - return to the previous page.
To get started, select your interface language and go to the “Create/Restore Wallet” page.
- Click Create a new wallet, and select Mainnet to use the Monero mainnet. Testnet is intended for programmers who want to help develop new network features. The Stagenet option allows you to safely test Monero. But if you don't plan to take part in development, select the main network and proceed to creation Monero wallet.
- Come up with a name for the wallet. Save the mnemonic phrase in a safe place and indicate where to place the data;
- Create a strong password. If you lose it, you can restore access to funds using seed, but to do this you will have to reinstall the program.
- Check the Start node in background checkbox if you are downloading the entire blockchain to a PC or Connect to a remote node to work with a remote server.
- Provide a location to download the blockchain if necessary.
- Specify the address and port to connect to the bootstrap node if you want to start working with the wallet without waiting for full synchronization with the Monero network. The list of remote nodes is available on the page https://moneroworld.com/.
When all settings are completed, a window will appear with a countdown to the start of the program. If this is your first time creating a personal full node, wait until your node is fully synchronized. Special settings, such as running in view -only mode or manually adding an already downloaded block chain, are required when restoring an existing wallet.
Sending XMR
The wallet interface is generally quite simple.
Your balance in Monero is displayed at the top left, the wallet control panel is below, and the status of your connection is below the panel. The main part on the right is the main interactive window for making settings.
The “Send” tab is responsible for sending coins; there are several standard sections that need to be filled out; let’s look at them in more detail.
- Amount - here we indicate the desired amount of the shipment.
- Transaction priority - essentially, commission settings are set here. The higher the “fee” value, the faster the transaction will go through and the more you will spend on commission.
- Address - indicate the address to which the funds should be received.
- Payment ID - payment identifier. Since the basic functions of Monero are built on confidentiality, exchanges, stores and other organizations that use a single address for incoming transactions need to know who the payment came from in order to credit the funds to you. To do this, they provide a payment ID, which you must insert when sending funds. If you do not specify a Payment ID, the exchange will receive the funds, but will not know who to credit them to.
- Description - here you can add a description of the transaction.
After entering all the data, click “Send”.
Add to address book
The Send tab includes an address book or Address Book. Here you can enter addresses that you constantly work with so as not to search for them all the time. Let's look at how this is done.
- Address - enter the recipient's address.
- Payment ID — if necessary, enter the ID.
- Description — enter the name of the person or service.
Then click “Add” and our contact appears in the lists.
Receiving XMR
To receive coins, you need to go to the “Receive” tab.
Let's look at each section.
- Address - your address to which you will receive your coins. The system here is the same as with Bitcoin. Copy the address and give it to the sender or paste it into the receiving field if you are sending it to yourself.
- Payment ID - using the “Generate” button, you can generate unique IDs for your transactions in order to understand who the funds are coming from. This ID must be sent to the sender so that he can insert it into the appropriate field. “Clear” button to clear the created ID.
- Integrated address - integrated address. This is a combination of your address and Payment ID. This idea was introduced after many users simply forgot to indicate Payment ID and ended up losing their funds. If the service supports integrated addresses, it is enough to enter only it, without specifying the Payment ID.
- Amount - you can additionally specify the amount to receive to generate a QR code.
In the “History” tab, the history of your transactions is displayed, there is a convenient search by date and type of transaction: receiving, sending funds.
Changing cryptocurrencies to XMR via Shapeshift
Exchange Bitcoin and Ether for XMR
- To exchange your current cryptocurrencies for XMR, you can use the Shapeshift website.
- Here you can select which currency you want to exchange for Monero with just one click on the corresponding symbol.
- In the next step, you enter the sender and recipient account addresses. Leave the “Payment ID” field empty.
- By clicking on “Start Transaction” you start the exchange process. There you will receive an address to which you should send the exchanged currency. Here you will see information about the minimum and maximum transferred amounts.
- You will now need to enter the transaction number into Coinbase under “Accounts”/”Send”.
- You will then be able to see on MyMonero.com that Monero has been sent to your account.
Please note that trading cryptocurrencies is subject to large price fluctuations. Therefore, invest only a small portion of your funds in speculative activities.
Photo: Pixabay.com, chip.de
Advanced Wallet Features
Let's move on to the advanced functionality of the wallet. These functions are optional for use and will be described briefly as an introduction.
The “Advanced” tab, which includes several sections, is responsible for advanced functions.
The first one is “Mining” - de jure, you can start mining Monero directly from your wallet. De facto, you are unlikely to earn anything. Solo mining, even on the most powerful machines, is a very tiny chance of finding a block and getting a reward. However, this option protects the network very well and supports the decentralization of Monero. Therefore, if you want to help the network, you can run this option periodically.
- CPU threads - here we select the number of processor core threads that you are ready to use, and then click “Start mining”.Note:
Mining is only available if you are fully connected to the network and download the entire blockchain. By connecting to a remote node, as shown above, mining will not be available.
The next tab is “Check Payment” - it is responsible for proving the sending of coins. You can check if the coins were sent by asking the sender:
- Address – the address from which funds were sent.
- Transaction ID - unique transaction ID.
- Transaction key — secret key of the transaction.
After entering all the data, click “Check”.
If you are the sender, you can view this data in the “History” section.
South Korean citizens lost tens of millions of dollars worth of crypto assets
The last tab “Sign/verify” can be useful to prove that this wallet (address) is really yours. Considering the complete confidentiality of all transactions, this option is not without meaning. Let's take a closer look:
- At the top of the window we enter a message in the “Either message” field or select a file in the “or file” field and click “Sign”. In the “Signature” field we have generated a signature for this message.
- To prove that this is really our address, we send the other party our message, our signature and our address. Now the other party can easily check it. To do this, at the bottom of the window, in the “Either message” field, our message is entered, in the “Signing address” field - our address and in the “Signature” field - the signature that we sent. Then the “Verify” button is pressed.
If everything is entered correctly, we are not cheating and the address is really ours, a confirmation window “This is a good signature” will appear.
If we are deceiving and the address is not ours, or the other party made a mistake, for example, forgot to put a space in the message, a refuting window “This signature did not verify” will appear.
Best Monero Wallets [XMR]
Monero is a privacy coin that currently ranks 10th in market capitalization at $1,077,457,893, while XMR is valued at $64.94 (at the time of writing).
In today's article, we will be introducing different types of wallets that are suitable for storing XMR.
Official Monero Desktop GUI
Monero GUI was developed by the Monero team for members of their communities solely for storing XMR. The desktop wallet is compatible with a wide range of operating systems.
The main wallet menu displays your account balance in the top left corner, and below it is a tab where you can send funds, receive funds, view transaction history, or change account settings.
Read also: Singapore venture capital company invests $10 million in the cryptocurrency sector
In the bottom left corner of the menu there is a small icon that displays your connection status to the Monero chain network. When you are about to receive funds, please check to see if the status is "connected" so that your funds can be processed correctly.
Ledger Nano S
Ledger Nano S is a popular hardware wallet that is considered the most secure storage option for your cryptocurrency holdings. It supports hundreds of different cryptocurrencies, and starting in April 2020, it also began offering support for Monero.
The process of setting up a wallet is quite intimidating as it requires the user to have some knowledge in using the command line. But there is a very detailed guide that can help users with this process.
Read also: OTCBTC founder runs for mayor of Taipei
Leger uses a variety of security features that make it virtually impossible for hackers to access your funds, even if your personal computer is infected. The only downside to the Leger is the cost, which is around $80-90.
MyMonero
MyMonero is an online wallet, which means you can access your Monero funds from any web browser. The same core Monero developer who created the Monero Ledger integration also operates this wallet and provides users with secure, hosted Monero accounts.
The wallet does not have to run a full node, meaning it will run much faster. The account registration process takes less than a minute, but please keep your login key in 13 words where you won't lose it. These are not registered Monero servers, so if you forget or lose this key, you will not be able to access your account.
Despite the convenience and speed, the wallet also exposes your coins to the highest security risks. MyMonero even warns users about this during the wallet creation process by displaying the following message:
“...MyMonero has a very difficult time delivering its code to your browser securely. This means that there is a significant risk of using MyMonero for high volumes! "
Monerujo
If you are a trader who is rarely found in front of a desktop computer, then the mobile application is more suitable for you. There are very few mobile wallets in the market and Monerujo is only available for Android systems.
You can transfer funds from anywhere with your smartphone or view the funds being sent to your account. The wallet also has a conversion calculator that allows you to put into perspective XMR the value compared to other coins on the market.
Read also: CoinGate is now open for ERC20 token integration
The source code of the Monerujo software is publicly available for everyone to check out on GitHub. The developers are also open to advice from community members on how to improve the wallet code.
Exodus
Exodus is a desktop wallet that gives the user complete control over their encryption without storing any private keys.
It is one of the first desktop wallets to be fully compatible with ShapeShift, a popular instant cryptocurrency exchange that has support for a range of cryptocurrencies, allowing Exodus users to trade with them.
Like other desktop wallets, Exodus stores your crypto assets right on your device. Being a lightweight wallet, Exodus never forces you to download the entire blockchain onto your computer.
Read also: Uber and Airbnb want the government to help their contractors
The wallet charges a transaction fee every time a transaction is processed. Fees are paid to each blockchain network and their respective miners and are not retained by Exodus.
Monero Paper Wallet
The Monero paper wallet generator can be accessed from MoneroAddress, so it is recommended to use it offline so that your keys are never at risk.
Monero Paper Wallet will generate two QR codes and two keys, one representing your private key and the other a public key that can be used to send Monero directly to the paper wallet.
A paper wallet, when used correctly, can be just as secure as a hardware wallet, with almost zero chance of losing your coins to a hack or malware attack.
Guarda
Guarda is a multi-currency wallet that supports a wide range of cryptocurrencies including BTC, LTC, XRP, XMR and all ERC20 based tokens. This free wallet is compatible with devices that run Windows, Mac, and Linux. Additionally, no personal information is required during the installation process.
Guarda does not store private keys on its servers. When you install your wallet, you will also be given a backup passphrase. Unfortunately, 2FA or multi-signature options are not available.
Read also: Tencent says Libra poses serious threat to Alipay, WeChat Pay
There are some additional built-in features that are also very useful. This includes a built-in exchange platform that allows you to trade cryptocurrencies in your wallet. In addition, Guarda also allows you to purchase cryptocurrencies using fiat currencies. Visa or MasterCard payments are also accepted due to its collaboration with Coinify.
Guarda is available as a web and desktop wallet and can easily sync the two types of devices together.
Conclusion
These are our picks for the best wallets to store XMR. As the popularity of the coin grows, so will the number of options on the market. Regardless of your choice, be sure to use best security practices.